Wednesday, September 19, 2018

Top 3 Challenge 378

There were so many great cards this week and some great new faces. I really hope that you all will play along again with us and that you liked our Team Up challenge with Double Trouble. I know I had a blast and I have personally been making lots of school day themed cards. It was very hard for us to pick a top 3 for this week with all the great talent and different takes on the sketch and optional theme. Here are the top 3 in no particular order. 


Wednesday, September 12, 2018

Challenge 377 Top Cards

This sketch was a little on the tricky side. We had 2 brave soles that tackled the challenge and some great creative ways to do so. So well done job ladies. Thanks so much for taking on our sketch challenge. We love seeing your work. 


Tuesday, September 11, 2018

Tic Tac Tuesday #5 - Ends Sept 23rd


The challenge includes options from our past Technique challenges Shaker CardColor Resist, and Dimension.  So if you aren't sure what something is, or what a little more inspiration, check out these great tutorials!


middle row: Color Resist, Die Cut Summer
diagonal: Green, Die Cut, Dimension


diagonal ... school // die cut // blue


Kaylin 
School/Color Resist/Green


School//Die Cut//Blue

Red, Die Cut, Shaker


Green-Shaker-Blue


Wednesday, September 5, 2018

Color Challenge # 4 Top Cards

Thanks to everyone that has participated in this and other color challenges. It has been fun to see what you guys decide to create with the color combos I come up with. Here are the top cards for this challenge. 


20180827_084428


Monday, September 3, 2018

Challenge 378 - Ends Sept 16th

Optional Theme: School Days


Thanks Donna

For Challenge 378 we are teaming up with Double Trouble as part of their Double Dare. Together we are celebrating school days. If you use the TSOT sketch and a school theme you can enter both our challenges. They also have an optional challenge of adding a bookmark. Please check Double Trouble for more details and their rules. For this challenge cards/posts done Sept 3rd will be accepted. 


Check out the great inspiration from our team below and go to Double Trouble to see how they used all these twisted challenges.

Saturday, September 1, 2018

September Technique Challenge


There are many clever ways to create card folds. Some are simple while others are more complex. If you are new to papercrafting, you should select a simple fold to start. This tutorial does not attempt to include all folds. There are many inspiring examples (and tutorials) at Splitcoast Stampers, You Tube, Pinterest, etc. Remember that you will frequently find cards with the same fun fold name but are made differently. 

Materials

·         Quality mid-weight cardstock that folds without difficulty but does not tear when scored or pressed with a bone folder.

·         Patterned paper as required or desired.

·         Strong adhesives such as Score Tape plus a good quality liquid adhesive.

·         Bone folder to press or burnish folds.

·         Trimmer with a sharp blade for smooth and accurate cuts.

·         Accurate measuring tools with eighth of an inch markings (1/8, 3/8, 5/8, 7/8). Some tools do not have the eighth inch markings.

·         Additional items as required or desired to complete the project.

If you’re new at fun and fancy folds, this Double Point design is one of the easiest with great results. The following directions refer specifically to this card.

After selecting cardstock and patterned paper, cut as follows:
Black cardstock - 1 panel @ 4.25” x 5.5” AND another for die cut label
White cardstock - 1 panel @ 4” x 5.25” AND another for stamped image
Patterned paper - 2 panels @ 4” x 3” scored at 1” on the short edge (so the long edge will fold over to attach to the end of the white cardstock).

Stamp design on white cardstock and die cut with desired shape. Die cut black cardstock to create a mat.


Fold the patterned paper pieces along the score line. Fold each corner to the fold line to create a triangle.


Adhere the triangles to each end of the white cardstock.


Stamp the inside design or sentiment ensuring it will be hidden by the stamped label once affixed. Adhere the stamped white card that has the double tips to the black cardstock.


 The card is now complete! You have an A2 card with a low profile for easy mailing.


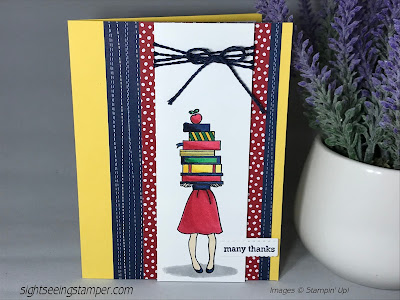
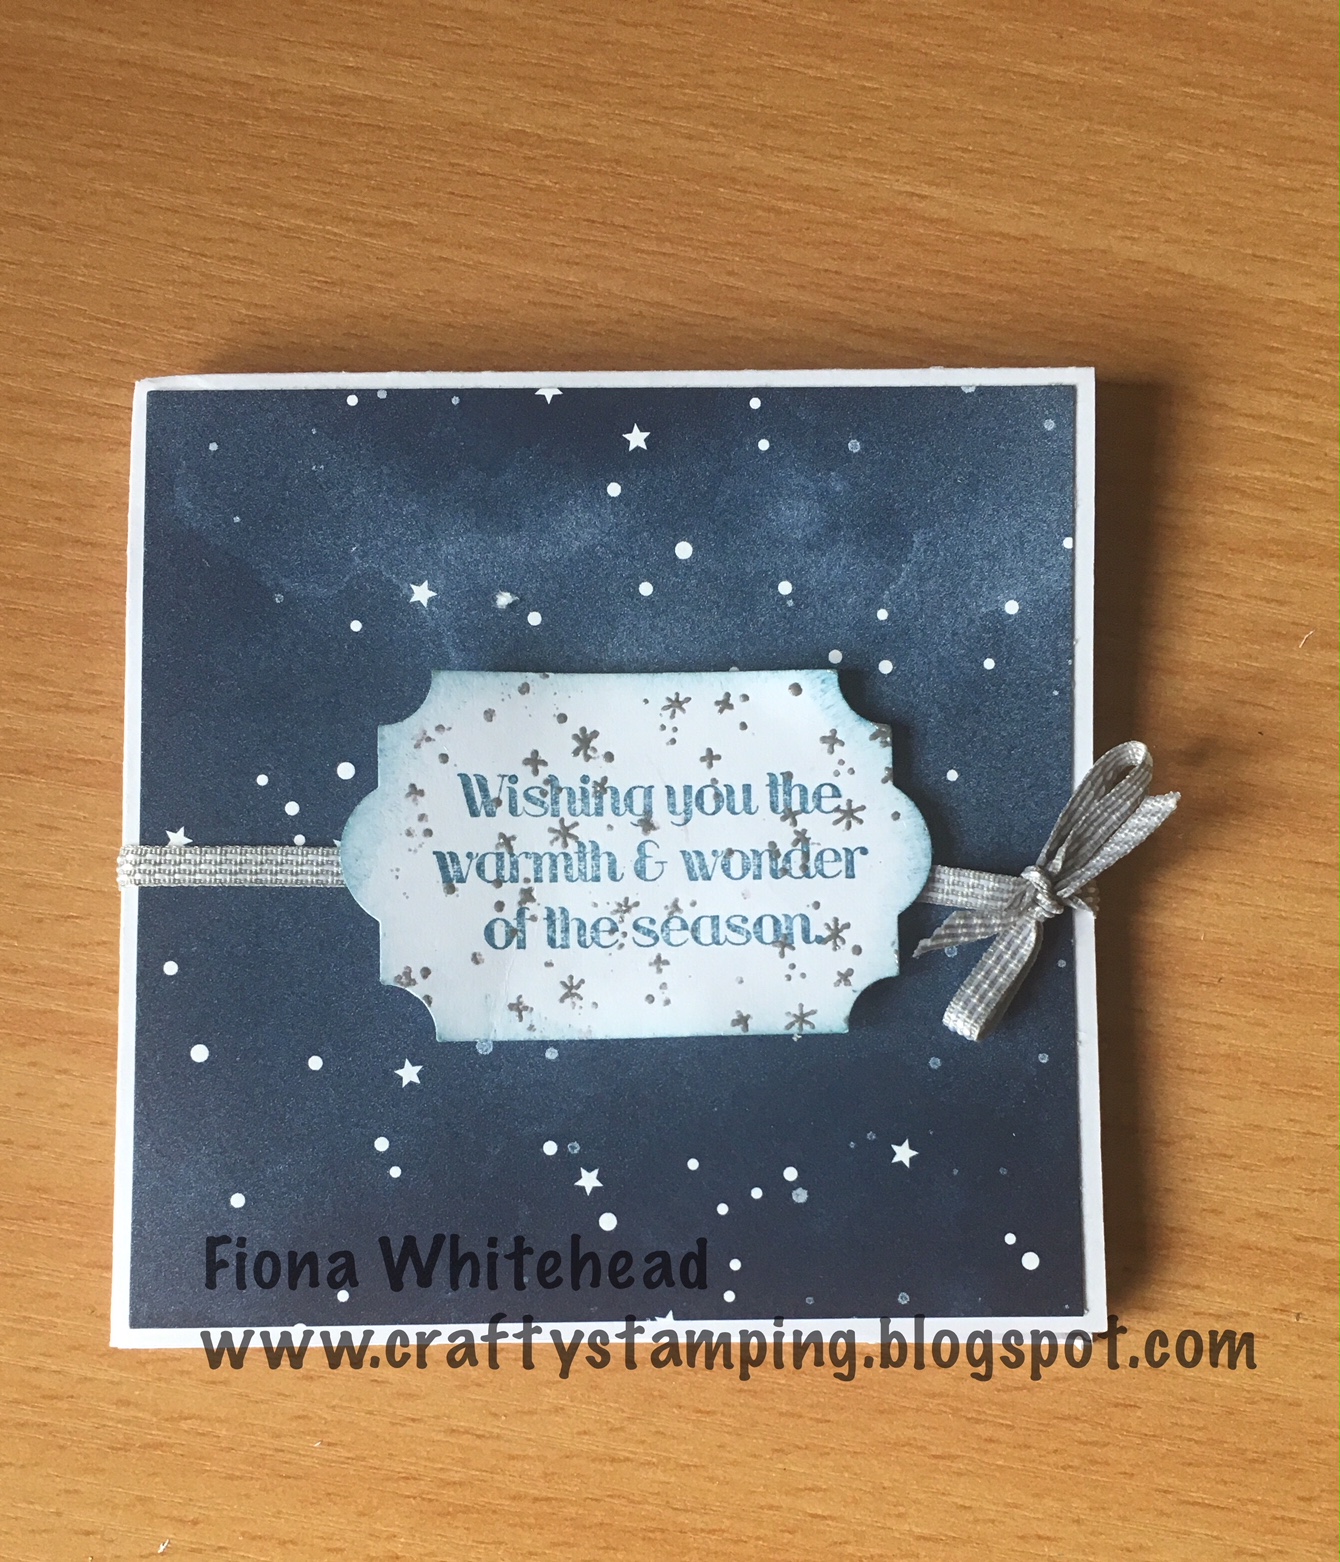
Design Team Inspiration

                                                               
                                                                         VICKI